Viking ovens feature a self-cleaning function that simplifies maintenance. This process uses high heat to burn food residue, leaving ash that’s easy to wipe away. Regular cleaning ensures optimal performance and extends the oven’s lifespan. Follow these guidelines to master the self-cleaning process effectively.
1.1. Overview of the Self-Cleaning Feature
The self-cleaning feature on Viking ovens uses high heat to burn food residue, turning it into ash for easy cleanup. This process eliminates the need for harsh chemicals, making maintenance simpler and safer. The feature is designed to handle tough stains and grime efficiently, ensuring your oven remains in excellent condition. Proper preparation, such as removing racks and utensils, is essential for optimal results. This function not only saves time but also helps maintain the oven’s performance and longevity over time.
1.2. Importance of Regular Oven Maintenance
Regular maintenance is crucial for ensuring your Viking oven operates efficiently and safely. Over time, food residue and grime can build up, affecting performance and creating unpleasant odors. Cleaning prevents tough stains from becoming harder to remove and ensures the self-cleaning feature works effectively. A well-maintained oven also promotes even cooking, reduces energy consumption, and prevents potential fire hazards. By prioritizing regular upkeep, you extend the lifespan of your appliance and keep it in optimal condition for years to come.
Understanding the Self-Cleaning Cycle
The self-cleaning cycle uses high temperatures to burn food residue into ash, simplifying cleanup. It’s a convenient feature that reduces manual scrubbing and ensures a hygienic oven environment.
2.1. How the Self-Cleaning Process Works
The Viking oven’s self-cleaning process operates by sealing the oven and heating it to extremely high temperatures, typically between 800°F and 1000°F. This intense heat burns food residue, turning it into ash. The cycle duration varies from 2 to 4 hours, depending on the model and the amount of soil. Before starting, ensure the oven is clear of racks, utensils, and debris. Once the cycle is complete, allow the oven to cool before wiping away the ash with a damp cloth. Proper ventilation is essential to prevent smoke and fumes from accumulating in the kitchen.
2.2. Benefits of Using the Self-Cleaning Function
Using the self-cleaning function on your Viking oven offers several advantages. It eliminates tough food residue and grime through high heat, leaving the oven interior clean. This process is energy-efficient and reduces the need for harsh chemicals. Regular use extends the oven’s lifespan by maintaining its performance and appearance. The function is also time-saving, as it automates the cleaning process. Additionally, it ensures a hygienic cooking environment and prevents lingering odors. Overall, it makes oven maintenance easier and more effective, preserving your appliance’s quality over time.
Preparing Your Viking Oven for Self-Cleaning
Remove racks and utensils to prevent damage. Wipe away loose debris with a damp cloth. Protect the oven window with foil and ensure doors seal tightly. Clear the surrounding area and ensure proper ventilation by opening windows. Avoid using harsh chemicals. Check the oven’s condition; heavy soiling may require pre-cleaning. Allow ample time for the cycle and cooling. Consult the manual for specific settings. Clean racks separately with baking soda. Plan accordingly to avoid interruptions during the process.
3.1. Removing Oven Racks and Utensils
Before starting the self-cleaning cycle, remove all racks, trays, and utensils to prevent warping or damage. Place racks in a safe location, such as the sink or a heat-resistant surface. For racks with heavy buildup, soak them in hot soapy water or run through a dishwasher cycle. Do not leave metal utensils inside, as high heat can cause discoloration or damage. This step ensures the oven interior is accessible for effective cleaning and avoids potential hazards during the intense heat of the self-cleaning process.
3.2. Wipe Away Loose Debris
Use a soft brush or damp cloth to remove loose food particles and debris from the oven walls, floor, and shelves. This step ensures the self-cleaning cycle works efficiently and prevents excessive smoke. Avoid using harsh chemicals or abrasive scrubbers, as they may damage the oven’s finish. For stubborn particles, lightly scrape with a plastic spatula. This preparation helps the high-heat cycle effectively break down tough grime, making the cleaning process smoother and more thorough.
3.3. Protecting the Oven Window and Doors
Before initiating the self-cleaning cycle, cover the oven window and doors with heat-resistant tape or a protective film to prevent discoloration from intense heat. This step ensures the glass remains clear and maintains its durability. Additionally, apply a thin layer of heat-resistant glass cleaner to the window for extra protection. Avoid using abrasive materials, as they may scratch the surfaces. Proper protection preserves the oven’s aesthetic appeal and functionality, ensuring longevity and clear visibility for future use;
Step-by-Step Self-Cleaning Instructions
Follow a structured approach to activate and monitor the self-cleaning cycle, ensuring safety and efficiency. Remove racks, set the timer, and let the oven clean thoroughly.
4.1. Starting the Self-Cleaning Cycle
To begin, ensure the oven is preheated and free from large debris. Press the Self-Clean button on the control panel. Select the desired cleaning duration using the touchpad, typically 2-4 hours. Confirm your selection, and the oven will lock automatically. The cycle uses high heat to burn food residue into ash. Ensure proper ventilation and avoid opening the door during the process. Once started, the cycle cannot be interrupted, so double-check settings before starting. Let the oven work uninterrupted for optimal results.
4.2. Monitoring the Cleaning Process
During the self-cleaning cycle, monitor the oven from a safe distance. Ensure the kitchen is well-ventilated to prevent smoke buildup. Avoid opening the oven door, as it will be locked. Check for unusual odors or excessive smoke, which may indicate large debris burning. If smoke is heavy, reduce ventilation temporarily. Let the cycle complete, as interrupting it may leave residue. Stay nearby to address any issues promptly. Once done, allow the oven to cool before proceeding with post-cleaning steps.
4.3. Dealing with Odors and Smoke
Odors and smoke are common during the self-cleaning cycle due to burning food residue. Ensure proper ventilation by opening windows and turning on exhaust fans. If smoke is excessive, temporarily reduce ventilation to let the oven handle the burn-off. Avoid inhaling fumes and stay in the room to monitor. If odors linger post-cleaning, wipe surfaces with a damp cloth. Prevent future odors by cleaning spills promptly and using the steam clean feature for lighter messes. Regular maintenance reduces smoke intensity during self-cleaning.

Post-Cleaning Tips and Maintenance
Allow the oven to cool, then wipe away ash and residue. Clean racks and utensils separately. Regular maintenance prevents food residue buildup.
5.1. Allowing the Oven to Cool Down
After the self-cleaning cycle, let the oven cool completely. This prevents burns and ensures safe handling. Allow it to cool for 2-3 hours. Once cooled, wear oven mitts to avoid burns. Proper cooling ensures all residue is hardened, making cleanup easier. Always prioritize safety when handling hot surfaces. Letting it cool prevents damage to enamel surfaces. Ensure the oven is cool before wiping away ash. This step is crucial for effective post-cleaning maintenance. Refer to your Viking oven manual for specific cooling times.
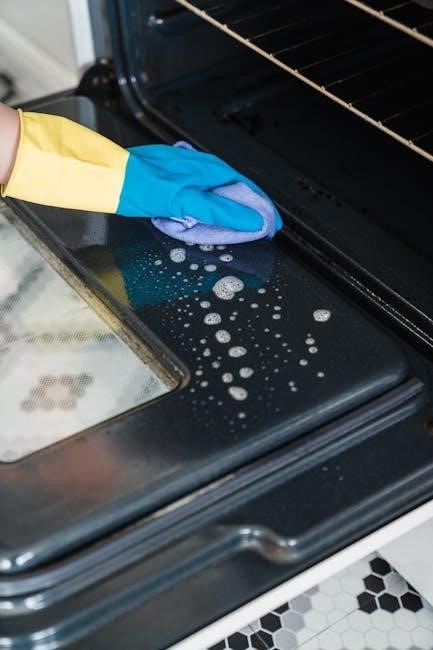
5.2. Wipe Out Ash and Residue
Once the oven has cooled, use a damp paper towel or soft sponge to wipe away ash and residue. This step is most effective while the oven is still slightly warm but safe to touch. Avoid using harsh chemicals, as they can damage the enamel. For tougher residue, dampen the towel with water or a mild dish soap solution. Wipe thoroughly, ensuring all ash is removed. Rinse the sponge or towel frequently to prevent spreading residue. This step ensures a clean finish and prepares the oven for future use.
5.3. Cleaning Oven Racks and Utensils
After the self-cleaning cycle, remove oven racks and utensils for thorough cleaning. Soak them in warm soapy water to loosen food residue. Use a soft sponge or brush to scrub away tough stains. Avoid abrasive materials that could scratch the surfaces. Rinse thoroughly and dry with a clean towel to prevent water spots. For heavily soiled racks, a gentle dishwasher cycle may be used. Regular cleaning of racks ensures optimal performance and prevents grease buildup during future use.
Special Considerations for Viking Ovens
Viking ovens require attention to specific features like high-heat settings, steam cleaning options, and enamel protection. Always refer to the manufacturer’s guidelines for optimal results.
6.1. Time and Temperature Settings
Viking ovens typically require a self-cleaning cycle of 2-4 hours at high temperatures (850°F ― 900°F). Always follow the manufacturer’s recommended time and temperature settings to avoid damage. Ensure the oven is preheated before starting the cycle for optimal results. Adjust settings if necessary, but never exceed the maximum temperature specified in the user manual. Proper timing ensures thorough cleaning without risking enamel degradation or other complications. Consult your Viking oven’s manual for precise instructions tailored to your model.
6.2. Using the Steam Clean Feature
The Steam Clean feature on Viking ovens offers a gentle, eco-friendly cleaning option. To use it, pour water into the oven’s steam cleaner pan and place it on the bottom rack. Set the temperature to 200°F ― 300°F and let the cycle run for about 30 minutes. The steam will loosen food residue, making it easy to wipe clean afterward. This method is ideal for light to moderate messes and helps maintain the oven’s enamel without harsh chemicals. Always follow the manufacturer’s guidelines for best results.
6.3. Avoiding Damage to Enamel Surfaces
To protect the enamel surfaces of your Viking oven, avoid using abrasive cleaners or scrubbers, as they can scratch the finish. Never use bleach or acidic cleaning products, as they may damage the enamel. Instead, opt for gentle cleaners specifically designed for enamel surfaces. After the self-cleaning cycle, wipe away ash with a damp cloth to prevent it from hardening. Regularly cleaning up spills and food residue can also prevent enamel damage. Always follow the manufacturer’s recommendations for cleaning products and techniques.
Safety Precautions During Self-Cleaning
Ensure proper ventilation to prevent carbon monoxide buildup. Wear protective gear like gloves and goggles. Keep children and pets away during the self-cleaning cycle.
7.1. Ensuring Proper Ventilation
Proper ventilation is crucial during the self-cleaning cycle to prevent harmful fumes from accumulating. Open windows and doors to allow fresh air to circulate. Turn on your kitchen exhaust fan to direct fumes outside. Ensure vents are not blocked to maintain airflow. This helps eliminate odors and reduces the risk of carbon monoxide buildup. Poor ventilation can lead to lingering chemical smells or dangerous fume concentrations, so prioritize a well-ventilated space before starting the cycle.
7.2. Wearing Protective Gear
Wearing protective gear is essential during the self-cleaning process to safeguard against heat, fumes, and potential splatters. Use oven mitts or heat-resistant gloves to handle hot surfaces. Wear long sleeves, closed-collar shirts, and protective eyewear to prevent skin and eye irritation. A face mask can help filter out strong fumes. Ensure proper ventilation and avoid leaning over the oven to minimize exposure. Protective gear ensures safety and comfort throughout the cleaning process.
7.3. Keeping Children and Pets Away
Keeping children and pets away during the self-cleaning cycle is crucial for their safety. The high heat and fumes released can be hazardous, especially for curious kids or anxious pets. Ensure they stay in a different room or area away from the oven. Distract them with activities or toys to prevent curiosity. Inform family members to avoid accidental disturbances. Supervise pets to ensure they don’t attempt to investigate the oven. This precaution ensures a safe and uninterrupted cleaning process, protecting both your loved ones and your Viking oven.
Advanced Cleaning Tips for Viking Ovens
Explore advanced cleaning strategies to optimize your Viking oven’s efficiency and durability. Learn specialized methods and maintenance tips for a pristine appearance and improved performance.
8.1. Using Baking Soda for Tough Stains
Baking soda is a natural and effective cleaner for tackling stubborn stains in your Viking oven. Mix 1 tablespoon of baking soda with water to form a paste. Apply it directly to stains and let it sit overnight. The abrasive properties of baking soda help break down grime without damaging surfaces. After soaking, use a damp cloth or sponge to wipe away the residue. For tougher spots, lightly scrub with a non-abrasive brush. This method is eco-friendly and gentle on enamel surfaces, ensuring a sparkling finish without harsh chemicals.
8.2. Deep Cleaning the Oven Glass
Deep cleaning the oven glass on your Viking oven requires gentle yet effective techniques. Use a mixture of equal parts water and white vinegar in a spray bottle. Apply the solution to the glass and let it sit for 10-15 minutes to loosen grime. Gently scrub with a soft, lint-free cloth or a non-abrasive sponge. Avoid harsh chemicals or abrasive materials that could scratch the surface. For stubborn streaks, repeat the process or use a glass-specific cleaner. Finally, wipe the glass with a dry cloth to remove any residue and restore clarity.
8.3. Managing High-Temperature Burns
High-temperature burns during Viking oven self-cleaning can be dangerous. Always wear heat-resistant gloves when handling hot surfaces. If a burn occurs, immediately run cool tap water over the affected area for 10-15 minutes. Apply a topical burn ointment and cover with a sterile bandage. Avoid using ice or butter, as this can worsen the injury. If burns are severe or blistering, seek medical attention promptly. Keep children away from the oven during and after cleaning to prevent accidents.

Troubleshooting Common Issues
Troubleshooting common issues during Viking oven self-cleaning ensures optimal performance. Address error codes, uneven heating, or lingering odors by consulting the user manual or contacting support.
9.1. Dealing with Excessive Smoke
Excessive smoke during Viking oven self-cleaning can be alarming. Ensure proper ventilation by opening windows and turning on exhaust fans. Check for blockages in vents or ducts. Avoid overloading the oven with debris, as this can intensify smoke. If smoke persists, pause the cycle, let the oven cool slightly, and resume. Always monitor the process to prevent overheating. Refer to your Viking oven manual for specific guidance on managing smoke during self-cleaning cycles.
9.2. Fixing a Malfunctioning Self-Clean Function
If the self-clean function on your Viking oven isn’t working, start by checking the power supply and ensuring the oven is properly plugged in. Verify that the circuit breaker hasn’t tripped. Next, review the user manual to ensure you’re using the correct settings. If the issue persists, reset the oven by unplugging it for 30 minutes. Check for any error codes and refer to the troubleshooting section in your manual. For unresolved issues, contact Viking customer support or a certified technician for professional assistance.
9.3. Addressing Odor Lingering After Cleaning
If your Viking oven has lingering odors after cleaning, ensure it has completely cooled before wiping down surfaces. Dampen a clean cloth to remove any remaining ash or residue. To neutralize smells, place a bowl of white vinegar or a small amount of baking soda inside the oven and let it sit for a few hours. For persistent odors, mix baking soda and water to create a paste, apply it to interior surfaces, and let it sit before wiping clean. Ensure proper ventilation by checking and cleaning vent filters to prevent odor retention. If odors persist, consider deeper cleaning or consulting a professional.
Eco-Friendly Cleaning Alternatives
Eco-friendly alternatives like baking soda, vinegar, and lemon juice effectively clean Viking ovens without harsh chemicals, promoting sustainability and reducing environmental impact.
10.1. Natural Cleaning Agents for Ovens
Natural cleaning agents like baking soda and water or white vinegar are effective for eco-friendly oven cleaning. Mix baking soda with water to form a paste, apply to interior surfaces, and let sit overnight. For tougher stains, white vinegar in a spray bottle can help break down grime. Lemon juice is another natural option, offering a fresh scent. These methods reduce chemical use and are environmentally friendly. Always test a small area first to ensure no damage to surfaces. Avoid using bleach or abrasive cleaners to maintain your Viking oven’s enamel finish.
10.2. Reducing Chemical Use in Cleaning
To reduce chemical use, opt for natural alternatives like baking soda and vinegar, which are effective and eco-friendly. Avoid harsh chemicals that can damage the oven’s finish or release harmful fumes. Spot clean spills immediately to prevent grime buildup. Regular wiping with a damp cloth can also minimize the need for strong cleaners. By adopting these practices, you maintain a clean Viking oven while promoting a healthier environment and extending the appliance’s lifespan.
10.3. Energy Efficiency During Self-Cleaning
Viking ovens are designed with energy efficiency in mind, even during self-cleaning cycles. The process uses high temperatures to burn food residue, reducing the need for prolonged heating. To optimize energy use, run the self-clean cycle after baking to utilize residual heat. Select the shortest recommended cycle for lighter messes to conserve energy. Proper ventilation is also key to maintaining efficiency and safety. By following these tips, you can clean your oven effectively while minimizing energy consumption.
By following Viking oven self-cleaning instructions, you can maintain a clean, efficient, and safe cooking environment. Regular maintenance ensures optimal performance and longevity of your appliance;
11.1. Summary of Key Points
Proper preparation ensures a safe and effective self-cleaning process. Always remove racks and utensils, wipe away debris, and protect surfaces. The self-cleaning cycle uses high heat to burn food residue, leaving ashes to wipe away. Monitor for odors and smoke, ensuring ventilation. Post-cleaning, allow cooling, remove ashes, and clean racks. Special features like steam clean offer eco-friendly options. Regular maintenance enhances performance and longevity. Follow guidelines to avoid damage and keep your Viking oven in prime condition.
11.2. Final Tips for Maintaining Your Viking Oven
Regularly clean light spills to prevent tough stains. Check oven racks and ensure they’re in good condition. Use the right cleaning tools to avoid scratching surfaces. Refer to the user manual for specific maintenance recommendations. Keep the oven vent clean for proper airflow. Avoid using abrasive cleaners that might damage the finish. Regularly inspect and clean the oven door seals to maintain heat efficiency. Schedule deep cleans every few months to keep your Viking oven performing optimally and ensure longevity.